
While not a rule, this profile is standard practice where I fly.
Break the descent into 3 phases:
Plan a 3° descent angle for phase 1.
Phase 2, we fly whatever is needed to connect 10,000' to the IAF
Phase 3, is the approach, so you will have some sort of 3° guidance provided.
There are multiple ways to create a 30nm fix. One method is to go the FIX page and put a 30NM ring around the airport. Pressing the LSK for the fix will put a fix in the scratch pad that is the airport minus 30nm along the route of flight. Put this fix in the LEGS page. Set the descent angle of that fix as 3.0° and put an altitude of 10,000' above the field elevation.
The FMS will create a top of descent (TOD) point that is a 3° glidepath to the 30nm fix. Approaching 50nm to the TOD, The time and distance to the point will populate in green on the top right of the MFD. At some point, ATC will give pilots discretion to a lower altitude. Once a lower altitude is set the altitude preselect, the descent rate and angle will populate in green on the MFD as well. Within 1000' of the 3° glidepath (3nm from the TOD), the advisory VNAV should populate on the right side of the PFD. At the TOD point, select VSPD and select the advised vertical speed. Adjust thrust to follow the speed profile described above.
At 12,000', set thrust to idle, set vertical speed as 1200fpm, and select a speed of 250kts. Monitor not to exceed 250kts below 10,000'.
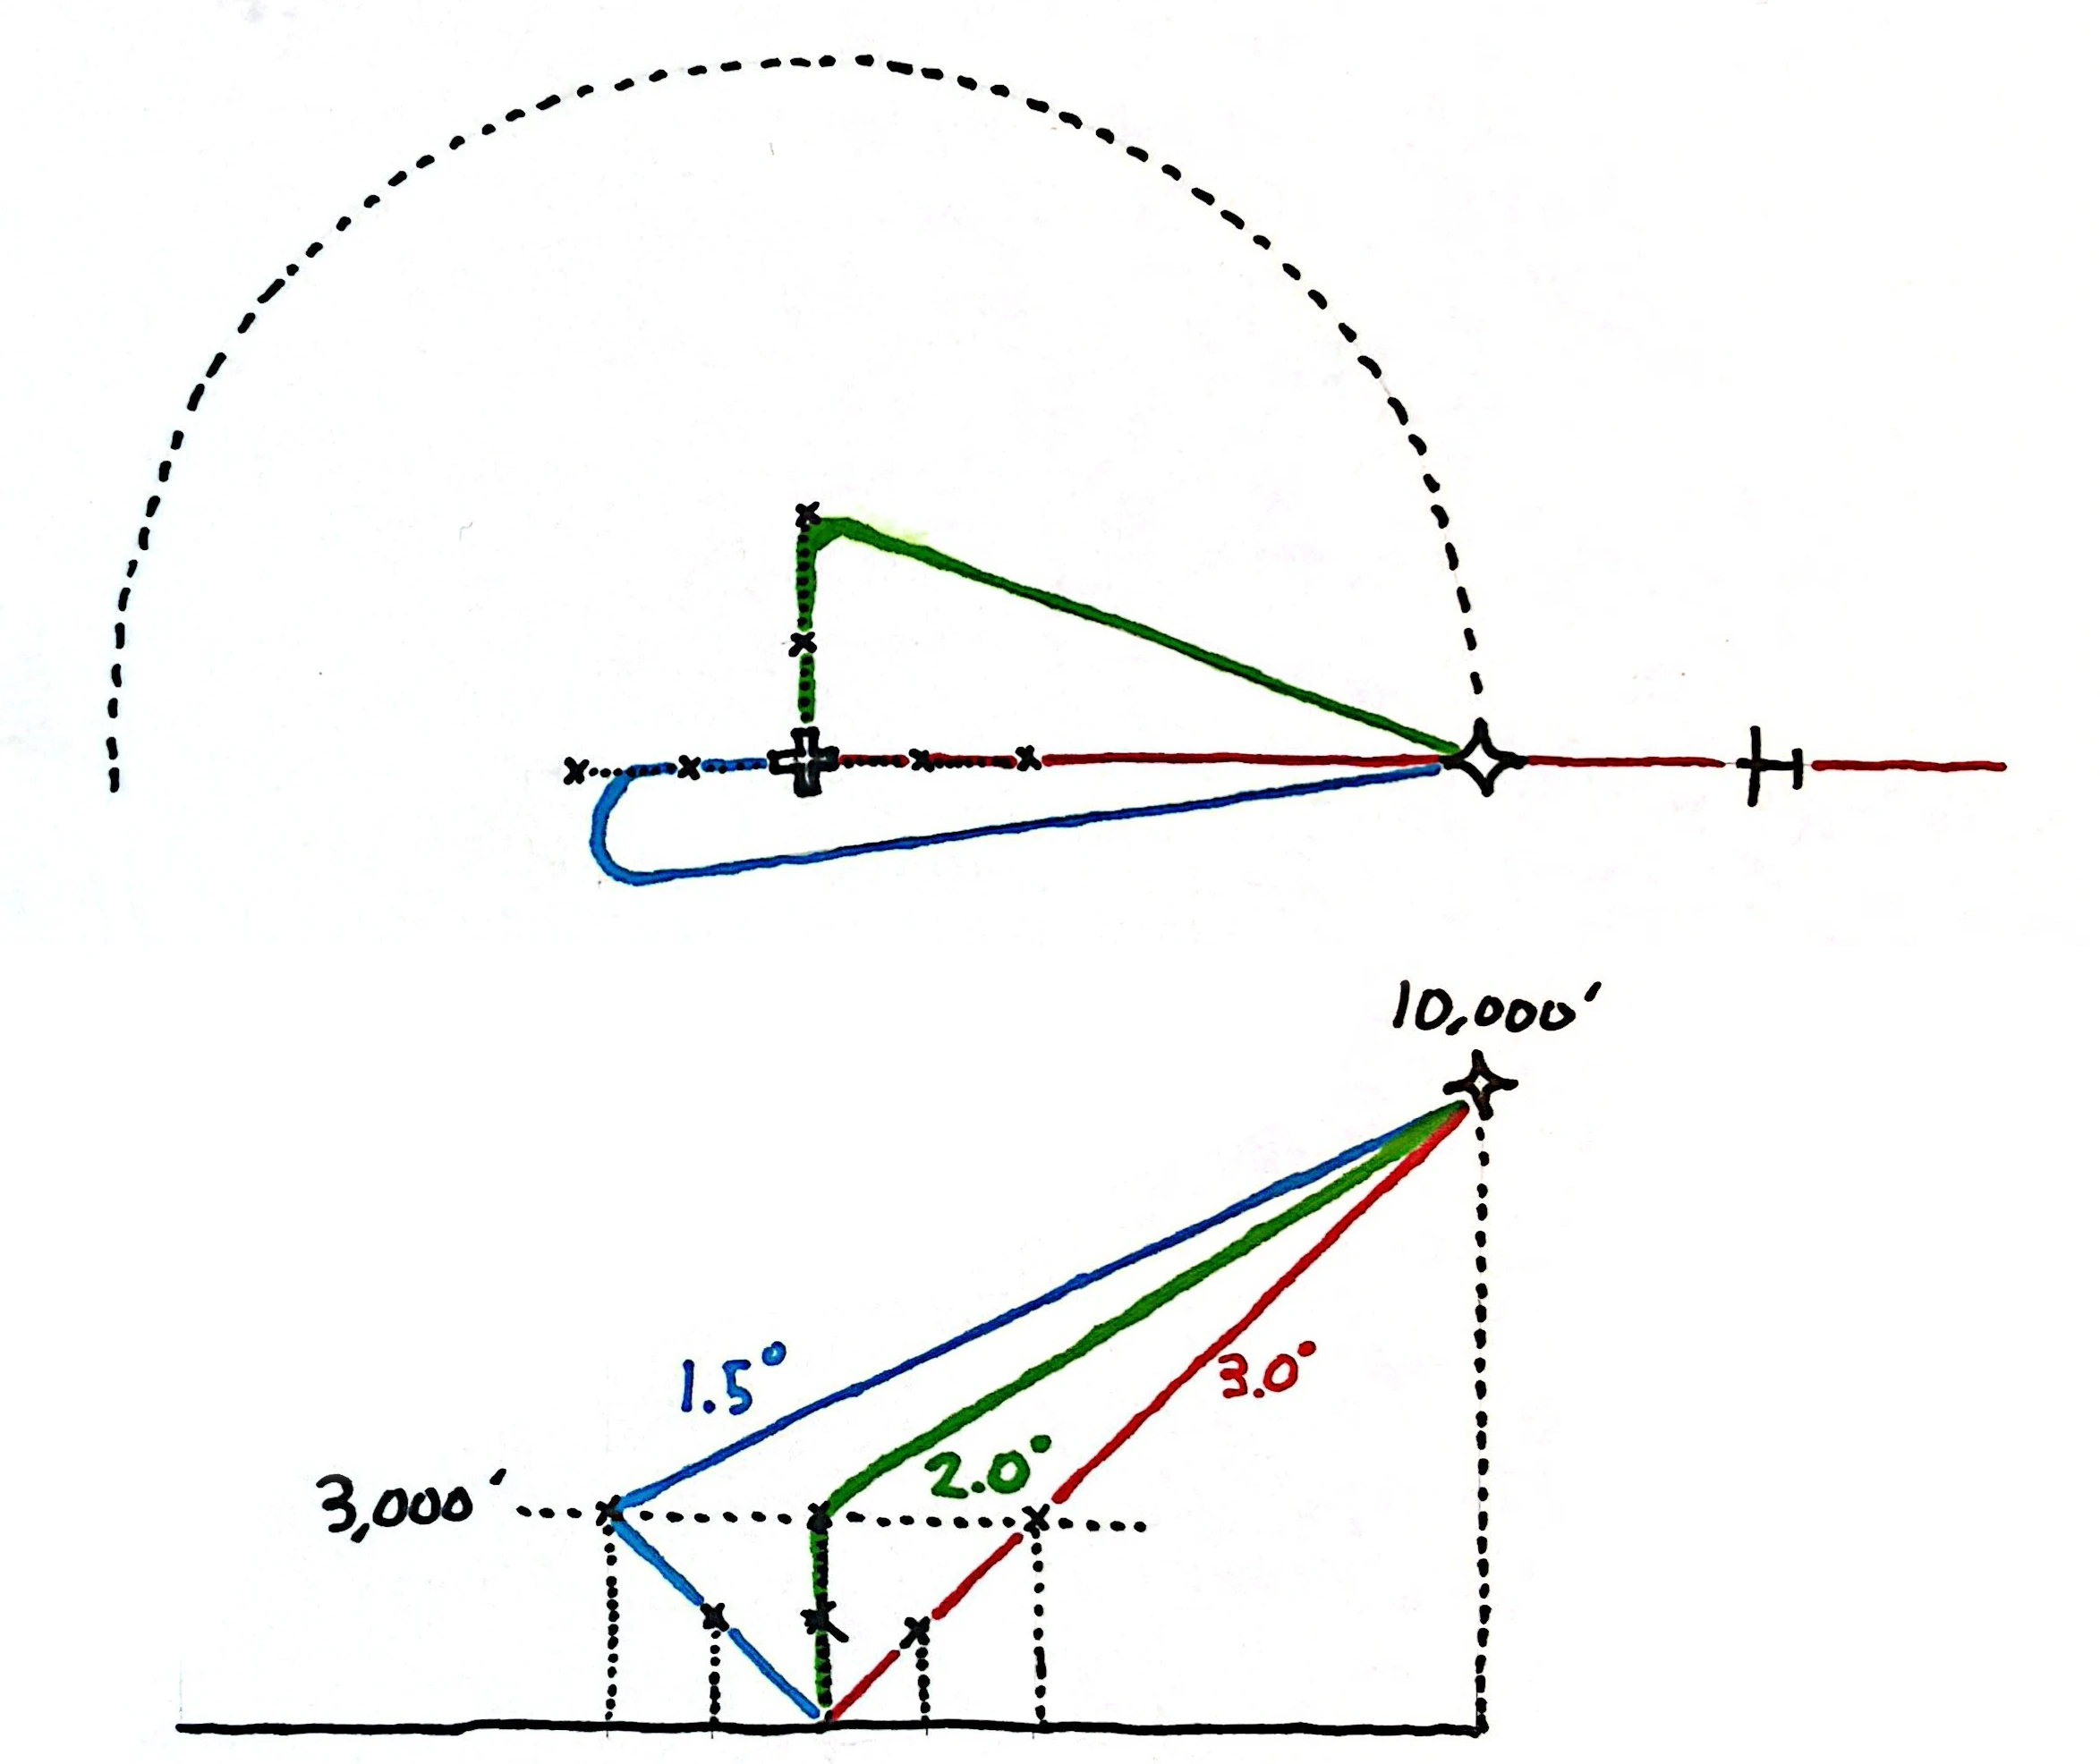
For perspective, this is what 3° really looks like to scale.
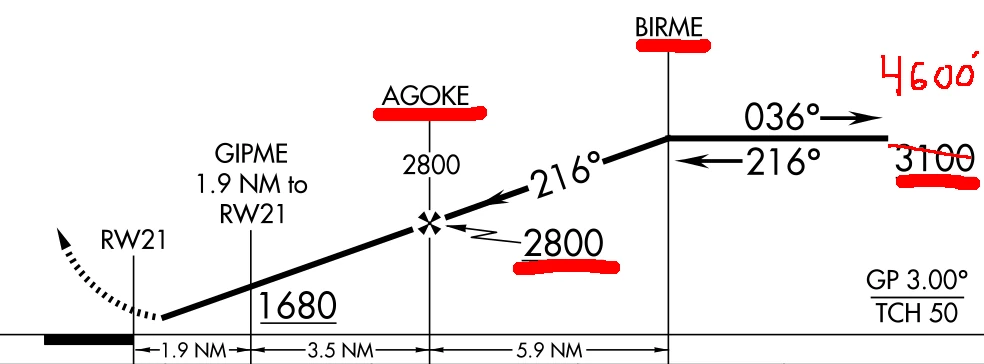
Now we aim to set ourselves up on a 3° glideslope to the runway. Let's take for example KMHK, RNAV runway 21. The FAF is AGOKE at 2800'. The IAF is BIRME at 3100'. The FAA chart's profile view would lead you to believe there is a constant angle of descent from BIRME through AGOKE to the runway but this is misleading. There is only a 300' difference despite the two fixes being 6NM apart. Using our 300' per NM rule, we wish to be at BIRME at 300' x 6NM = 1800' above AGOKE. Prior to the approach briefing, I would have penciled in 4600' for BIRME.
From the 30NM/10,000' fix, it is a perfect 3° slope to the runway. At 10,000', 250kts indicated, and standard conditions, we can expect about 290kts as for a true/ground speed. Plan for a descent rate of ~1500fpm.
From the 30NM/10,000' fix to the base fix at 3000' AFE (~10NM at 3°), is a 2° glideslope. At 290kts of groundspeed, plan a ~1000fpm descent
When the IF of the approach is on the other side of the airport from our direction, our 30NM/10,000' fix is about 40NM away and from the IF fix at 3000' AFE. The descent angle is 1.5°, plan a descent rate of ~800fpm at 290kts of groundspeed.
From 250kts, I begin slowing at 10nm from the FAF. In the case of a downwind, I begin slowing passing abeam the field. I like to slow at 5kts/10sec (the speed trend vector points down 5 kts) because I have calculated this takes 6nm to go from 250 to 200 and 4nm to go from 200 kts to 160 kts.
While slowing, the descent rate might need to be reduced to ~1000fpm at idle and the aircraft may trend above the 3° slope. Once speed is reduced and flaps come out, the descent rate can be increased and 3° glidepath recaptured.
For a 3° glideslope at 200kts, expect a descent rate of ~1000fpm.